Contents
- I. Introduction
- II. Understanding Composting
- III. Selecting a Composting Method
- IV. Choosing a Composting Location
- V. Gathering Composting Materials
- VI. Building Your Compost Pile
- VII. Composting Tips and Tricks
- VIII. Troubleshooting Common Composting Issues
- IX. Harvesting and Using Compost
- A. Signs that compost is ready for use
- B. Harvesting compost from the pile
- C. Ways to use compost in the garden
- 1. Envirocycle: The Most Beautiful Composter in The World
- 2. FCMP Outdoor IM4000 Tumbling Composter
- 3. Yimby Tumbler Composter
- 4. Exaco Trading Co. ECO-2000 Plus Kitchen Compost Waste Collector
- 5. Miracle-Gro Dual Chamber Compost Tumbler
I. Introduction
Welcome to the world of composting! If you’re an avid gardener or simply someone who wants to reduce waste and help the environment, starting a compost pile is a fantastic idea. Composting is the process of breaking down organic materials, such as kitchen scraps and yard waste, into nutrient-rich soil that can be used to nourish your plants and gardens.
Not only does composting help reduce the amount of waste that ends up in landfills, but it also provides a natural and sustainable way to improve the health of your soil. By creating your own compost pile, you can save money on fertilizers and pesticides while promoting the growth of healthy, vibrant plants.
In this article, we will guide you through the process of starting a compost pile for your garden. We will cover everything from choosing the right location and container to the materials you can compost and the do’s and don’ts of composting. By the end of this article, you’ll have all the knowledge you need to get started on your composting journey.
So, whether you’re a seasoned gardener looking to enhance your gardening practices or a beginner wanting to make a positive impact on the environment, let’s dive in and learn how to start a compost pile for your garden!
II. Understanding Composting

A. Definition of composting
Composting is a natural process that involves the decomposition of organic materials, such as kitchen scraps, yard waste, and other biodegradable materials. It is a sustainable and environmentally friendly way to recycle organic waste and create nutrient-rich soil amendments for gardening and farming.
Composting is essentially the breakdown of organic matter by microorganisms, such as bacteria, fungi, and worms, into a dark, crumbly substance called compost. This process occurs in the presence of oxygen, heat, and moisture, which provide the ideal conditions for the microorganisms to thrive and break down the organic materials.
By composting, we can divert a significant amount of waste from landfills, reduce greenhouse gas emissions, and improve soil health. Compost can be used as a natural fertilizer, enriching the soil with essential nutrients and improving its structure, water retention, and overall fertility.
B. How composting works
Composting is a simple and straightforward process that can be done in your backyard or even in a small apartment using a compost bin or compost tumbler. The key to successful composting lies in creating the right balance of organic materials, moisture, and oxygen.
There are two main types of composting methods: aerobic and anaerobic. Aerobic composting, which is the most common method, requires oxygen to support the activity of aerobic microorganisms that break down the organic matter. Anaerobic composting, on the other hand, occurs in the absence of oxygen and relies on anaerobic microorganisms.
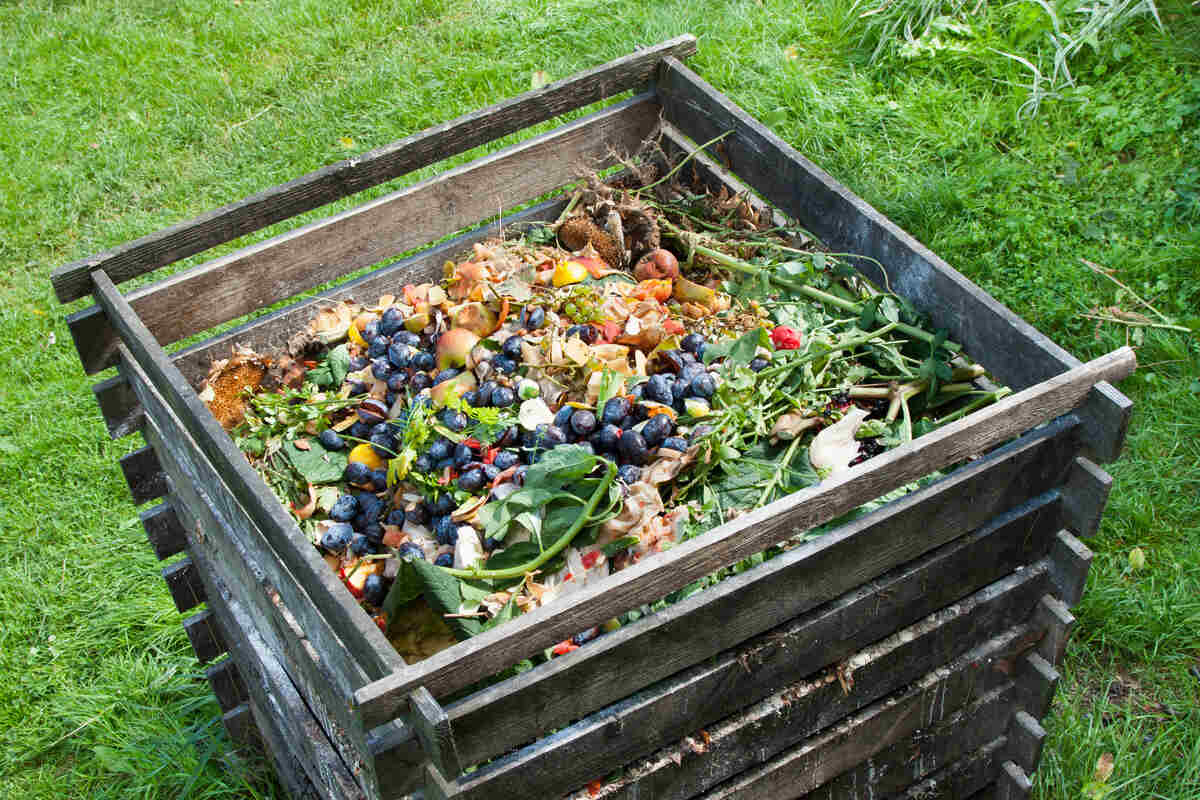
To start composting, begin by collecting a variety of organic materials, including fruit and vegetable scraps, coffee grounds, tea bags, eggshells, yard trimmings, leaves, and small branches. Avoid adding meat, dairy products, oily foods, and pet waste, as they can attract pests and slow down the composting process.
Next, layer the organic materials in your compost bin, alternating between green materials, such as fresh grass clippings and kitchen scraps, and brown materials, such as dried leaves and twigs. The green materials provide nitrogen, while the brown materials provide carbon, creating the ideal carbon-to-nitrogen ratio for composting.
It’s important to maintain the right moisture level in your compost pile. The materials should be damp, similar to a wrung-out sponge. If the pile becomes too dry, add water, and if it becomes too wet, add dry brown materials to absorb the excess moisture.
Regularly turning or mixing the compost pile helps to aerate it and speed up the decomposition process. This can be done using a pitchfork or a compost tumbler, ensuring that all the materials are exposed to oxygen and allowing the microorganisms to break them down more efficiently.
Over time, the organic materials will break down into a dark, crumbly substance known as humus, which is rich in nutrients and beneficial microorganisms. This compost can then be used to improve the quality of your garden soil, promote plant growth, and reduce the need for chemical fertilizers.
III. Selecting a Composting Method
When it comes to starting a compost pile for your garden, selecting the right composting method is crucial. There are several options available, each with its own advantages and considerations. In this section, we will explore three popular composting methods: traditional composting, vermicomposting, and bokashi composting.
A. Traditional Composting
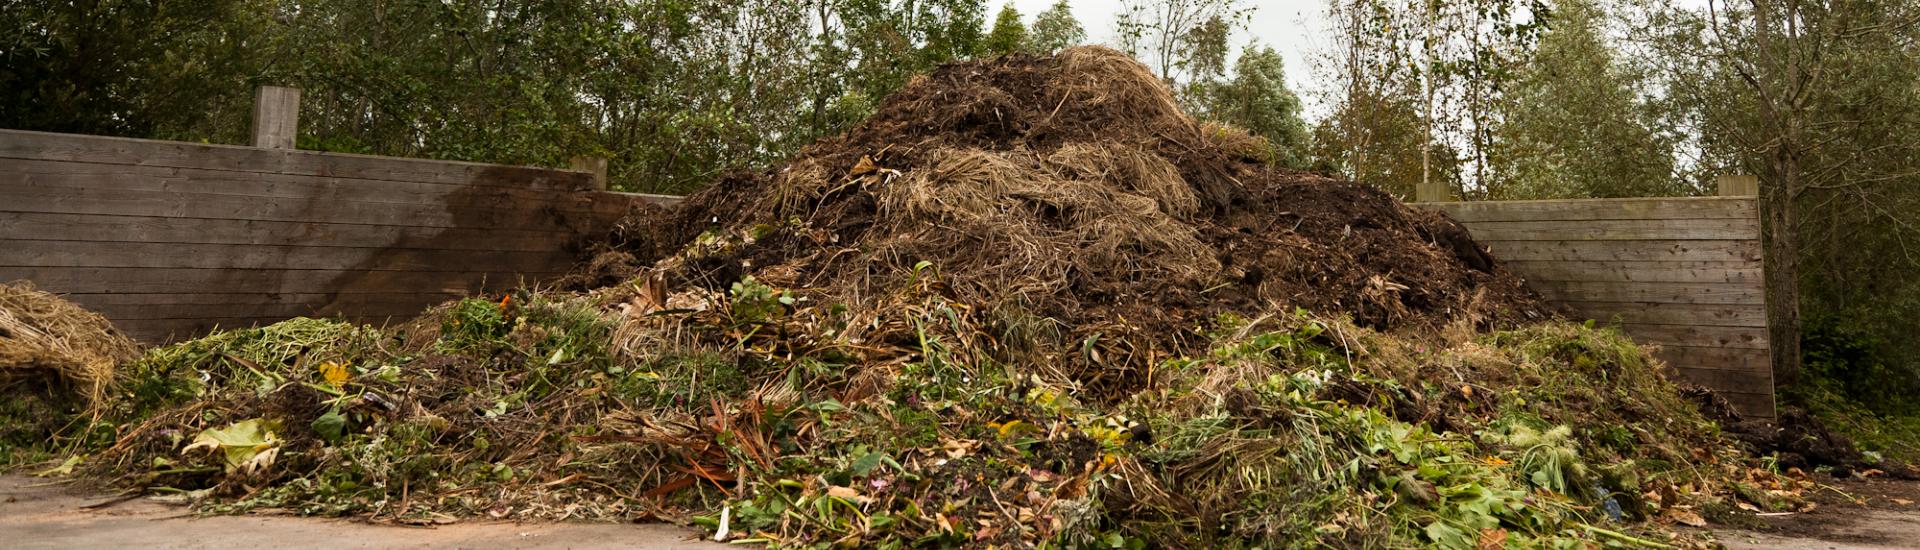
Traditional composting is a widely used method that involves the natural decomposition of organic materials. It is a simple and cost-effective way to create nutrient-rich compost for your garden. To start a traditional compost pile, you will need a designated area in your backyard or a compost bin.
The key to successful traditional composting is finding the right balance of green and brown materials. Green materials include kitchen scraps, grass clippings, and fresh plant trimmings. Brown materials, on the other hand, consist of dry leaves, straw, and wood chips. It is important to layer these materials in your compost pile to ensure proper aeration and decomposition.
Regular turning or mixing of the compost pile is essential to promote decomposition and prevent odors. This can be done using a pitchfork or a compost turning tool. It is also important to monitor the moisture levels of your compost pile. The ideal moisture content should be similar to a damp sponge.
Traditional composting is a versatile method that can handle a wide range of organic materials. However, it may take several months to a year for the compost to fully mature and be ready for use in your garden. Patience and regular maintenance are key to successful traditional composting.
B. Vermicomposting
Vermicomposting, also known as worm composting, is a method that utilizes the power of worms to break down organic materials. It is an excellent option for those with limited space or who live in urban areas. Vermicomposting can be done indoors or outdoors, depending on your preference and climate.
To start vermicomposting, you will need a worm bin or a specialized vermicomposting system. Redworms, also known as red wigglers, are the most commonly used worms for this method. These worms thrive in organic waste and help to accelerate the decomposition process.
The key to successful vermicomposting is providing the right environment for the worms. The bedding material, such as shredded newspaper or coconut coir, should be moist but not soggy. It is important to feed the worms a balanced diet of kitchen scraps, coffee grounds, and vegetable peels. Avoid adding meat, dairy, or oily foods to prevent odors and attract pests.
Regularly harvesting the worm castings, which are the nutrient-rich waste produced by the worms, is an important part of vermicomposting. This can be done by separating the worms from the castings using a simple technique called “worm migration.” The harvested castings can then be used as a natural fertilizer for your plants.
Vermicomposting is a fascinating and efficient method that allows you to recycle your kitchen waste while producing high-quality compost. It is a great option for those who want to minimize their environmental impact and create a sustainable garden.
C. Bokashi Composting
Bokashi composting is a unique method that utilizes beneficial microorganisms to ferment organic waste. It is an excellent option for those who want to compost meat, dairy, and oily foods, which are not suitable for traditional composting or vermicomposting.
To start bokashi composting, you will need a bokashi bin or a specialized bokashi system. The process involves layering the organic waste with a bokashi bran, which is a mixture of microorganisms that aid in the fermentation process. The waste is then sealed in an airtight container to create an anaerobic environment.
Unlike traditional composting and vermicomposting, bokashi composting is a relatively quick process. The fermentation typically takes around two weeks, after which the fermented waste can be buried in the soil or added to a traditional compost pile to complete the decomposition process.
Bokashi composting is a great option for those who want to compost a wide range of organic materials, including meat, dairy, and oily foods. It is a convenient and odor-free method that can be done indoors or outdoors. The fermented waste is rich in beneficial microorganisms, which can improve the soil health and fertility of your garden.
IV. Choosing a Composting Location
:strip_icc()/BHG-gardening-yard-compost-diy-compost-bin-step-Hero-A-e6c108bdf3ea457aaf16435a04c0dcd2.jpg)
When it comes to starting a compost pile for your garden, choosing the right location is crucial. The ideal location for a compost pile should meet certain criteria to ensure optimal decomposition and minimize any potential issues. Here are some factors to consider when selecting a spot:
A. Ideal location for a compost pile
1. Accessibility: It is important to choose a location that is easily accessible for adding materials to the compost pile. Consider placing it near your garden or kitchen for convenience.
2. Sunlight: Compost piles thrive in warm temperatures, so it is best to choose a location that receives ample sunlight. Aim for at least 6 hours of direct sunlight per day.
3. Drainage: Good drainage is essential to prevent waterlogging, which can lead to a smelly and anaerobic compost pile. Avoid low-lying areas that tend to collect water and choose a spot with proper drainage.
4. Proximity to water source: While you don’t want your compost pile to be waterlogged, it is important to have easy access to a water source for occasional watering. Consider placing the pile within reach of a hose or watering can.
5. Privacy: While not essential, some gardeners prefer to have their compost pile hidden from view. If privacy is a concern for you, choose a location that is discreet and away from main gathering areas.
B. Factors to consider when selecting a spot
1. Odor control: Composting can produce odors, especially if done incorrectly. To minimize any unpleasant smells, choose a location that is downwind from your living spaces and neighbors’ homes.
2. Air circulation: Adequate air circulation is crucial for a healthy compost pile. Avoid placing it in a confined space or against a wall. Instead, choose an open area that allows for good airflow.
3. Soil contact: Direct contact with the soil is beneficial for composting. It allows beneficial microorganisms to enter the pile and helps with drainage. Select a spot where the compost pile can come into contact with the soil.
4. Size and space: Consider the size of your compost pile and the space available. Ensure that the chosen location can accommodate the size of the pile and allow for easy turning and maintenance.
5. Aesthetics: While not a functional consideration, the appearance of your compost pile can be important to some gardeners. Choose a location that blends well with your garden or landscape design.
By carefully considering these factors, you can choose the perfect location for your compost pile. Remember, the right location will contribute to the success of your composting efforts and help you create nutrient-rich compost for your garden.
V. Gathering Composting Materials
Starting a compost pile for your garden is an excellent way to reduce waste, improve soil health, and promote sustainable gardening practices. To create a successful compost pile, you’ll need to gather the right materials. Composting materials can be categorized into two main types: green materials and brown materials.
A. Green materials for composting
Green materials, also known as nitrogen-rich materials, provide essential nutrients and moisture to the compost pile. These materials are typically high in nitrogen and help to speed up the decomposition process. Here are some examples of green materials that you can use:
- Grass clippings: After mowing your lawn, collect the grass clippings and add them to your compost pile. Make sure to spread them out in thin layers to prevent matting.
- Vegetable scraps: Kitchen scraps such as fruit and vegetable peels, coffee grounds, and tea bags are excellent sources of nitrogen for your compost pile.
- Plant trimmings: When pruning your plants, save the trimmings and add them to your compost pile. Avoid using diseased or pest-infested plant material.
- Seaweed: If you live near the coast, seaweed can be a valuable addition to your compost pile. Rinse off any excess salt before adding it to the pile.
- Manure: Animal manure, such as cow, horse, or chicken manure, is rich in nitrogen and can be a great addition to your compost pile. Make sure the manure is well-aged or composted before use.
B. Brown materials for composting
Brown materials, also known as carbon-rich materials, provide structure and balance to the compost pile. These materials are typically high in carbon and help to absorb excess moisture and prevent odors. Here are some examples of brown materials that you can use:
- Leaves: Fallen leaves are an abundant source of carbon for your compost pile. Shred them before adding them to the pile to speed up the decomposition process.
- Straw: Straw is another excellent source of carbon. Avoid using hay, as it may contain weed seeds.
- Wood chips: If you have access to wood chips, they can be a valuable addition to your compost pile. Make sure to use aged wood chips to prevent nitrogen depletion.
- Newspaper: Shredded newspaper can be used as a carbon source in your compost pile. Avoid using glossy or colored paper.
- Cardboard: Cardboard boxes or egg cartons can be torn into small pieces and added to the compost pile. Make sure to remove any tape or labels.
C. Avoiding certain materials in compost
While there are many materials that can be composted, there are also some materials that should be avoided. These materials can attract pests, introduce diseases, or contaminate the compost pile. Here are some materials to avoid:
- Meat and dairy products: These items can attract rodents and other pests to your compost pile. It’s best to avoid adding them.
- Grease and oils: Grease and oils can create a smelly and slimy compost pile. Avoid adding them to maintain a healthy composting environment.
- Coal or charcoal ash: Ash from coal or charcoal can contain harmful substances that are not suitable for composting. Avoid adding them to your pile.
- Plastic or synthetic materials: Non-biodegradable materials such as plastic, metal, or synthetic fabrics should not be added to the compost pile.
- Chemically treated materials: Avoid adding materials that have been treated with pesticides, herbicides, or other chemicals, as they can disrupt the composting process.
By gathering the right materials for your compost pile, you can create a nutrient-rich soil amendment that will benefit your garden and reduce waste. Remember to maintain a balance between green and brown materials, and avoid adding any materials that can harm the composting process. Happy composting!
VI. Building Your Compost Pile
Building a compost pile is an essential step in creating nutrient-rich soil for your garden. By layering green and brown materials, adding water, and maintaining the right moisture level, you can create a thriving compost pile that will benefit your plants and reduce waste. Let’s explore each step in detail:
A. Layering Green and Brown Materials
When building your compost pile, it’s important to create a balance between green and brown materials. Green materials are rich in nitrogen and include items such as grass clippings, vegetable scraps, and coffee grounds. Brown materials, on the other hand, are high in carbon and include items like dried leaves, straw, and wood chips.
To start, lay down a layer of brown materials as the base of your compost pile. This will help with aeration and drainage. Next, add a layer of green materials on top. It’s important to alternate between green and brown layers to create a well-balanced compost pile.
Continue layering the materials until you have built a pile that is at least three feet high. Remember to chop or shred larger materials to speed up the decomposition process. The layering process helps create air pockets and allows for proper decomposition.
B. Adding Water and Turning the Pile
After layering the materials, it’s time to add water to your compost pile. The moisture content is crucial for the decomposition process. The pile should be moist, similar to a damp sponge. If the pile is too dry, it will decompose slowly, and if it’s too wet, it may become anaerobic and produce unpleasant odors.
Use a garden hose or a watering can to evenly moisten the pile. Be careful not to overwater, as excessive moisture can lead to nutrient leaching. It’s a good idea to check the moisture level regularly and adjust accordingly.
In addition to watering, it’s important to turn the compost pile regularly. Turning the pile helps with aeration and mixes the materials, promoting faster decomposition. Use a pitchfork or a compost turning tool to gently mix the materials. Aim to turn the pile every two to three weeks to ensure even decomposition.
C. Maintaining the Right Moisture Level
Maintaining the right moisture level is crucial for a successful compost pile. As mentioned earlier, the pile should be moist, similar to a damp sponge. To maintain the moisture level, you may need to water the pile periodically, especially during dry periods.
On the other hand, if the pile becomes too wet, you can add dry brown materials to absorb the excess moisture. This will help prevent anaerobic conditions and unpleasant odors. It’s important to monitor the moisture level regularly and make adjustments as needed.
Remember that composting is a natural process, and it may take several months for the materials to fully decompose. By following these steps and maintaining the right moisture level, you can create a healthy compost pile that will provide nutrient-rich soil for your garden.
VII. Composting Tips and Tricks
A. Balancing carbon and nitrogen ratios
One of the key factors in successful composting is achieving the right balance between carbon-rich materials (often referred to as “browns”) and nitrogen-rich materials (referred to as “greens”). The ideal carbon to nitrogen ratio for composting is around 30:1. This balance is crucial because it affects the decomposition process and the quality of the resulting compost.
To achieve the proper balance, it is important to understand which materials are considered carbon-rich and which are nitrogen-rich. Carbon-rich materials include dry leaves, straw, wood chips, and shredded paper. Nitrogen-rich materials include grass clippings, kitchen scraps, coffee grounds, and fresh plant trimmings.
When adding materials to your compost pile, aim for a mix of carbon-rich and nitrogen-rich materials. If your compost seems to be decomposing too slowly, it may indicate an excess of carbon. In this case, add more nitrogen-rich materials to speed up the process. On the other hand, if your compost has a strong odor or is attracting pests, it may indicate an excess of nitrogen. To correct this, add more carbon-rich materials to balance the ratio.
B. Achieving proper aeration
Adequate aeration is essential for the composting process as it allows oxygen to reach the microorganisms responsible for decomposition. Without proper aeration, the compost pile can become compacted and anaerobic, leading to unpleasant odors and slow decomposition.
To ensure proper aeration, it is important to turn or mix the compost pile regularly. This can be done using a pitchfork or a compost turning tool. Turning the pile once every 1-2 weeks helps to introduce fresh oxygen and evenly distribute moisture and heat. It also prevents the formation of anaerobic pockets within the pile.
In addition to regular turning, you can also promote aeration by layering bulky materials such as twigs or straw at the bottom of the pile. These materials create air channels that allow for better airflow. Alternatively, you can use a compost bin or tumbler with built-in aeration features.
C. Monitoring temperature and pH levels
Monitoring the temperature and pH levels of your compost pile is crucial for ensuring optimal conditions for decomposition. The temperature of a healthy compost pile should range between 120°F and 160°F (49°C and 71°C). This temperature range promotes the activity of microorganisms and accelerates the breakdown of organic matter.
To monitor the temperature, you can use a compost thermometer inserted into the center of the pile. Regularly check the temperature and adjust the pile if it becomes too hot or too cold. If the temperature exceeds 160°F (71°C), it may indicate an imbalance in the carbon to nitrogen ratio. In this case, add more carbon-rich materials to cool down the pile. If the temperature drops below 120°F (49°C), it may indicate a lack of nitrogen. Adding more nitrogen-rich materials can help raise the temperature.
The pH level of the compost pile is another important factor to consider. The ideal pH range for composting is slightly acidic to neutral, around 6.0 to 7.0. This pH range provides an optimal environment for the microorganisms involved in decomposition. You can test the pH using a soil testing kit or pH paper. If the pH is too acidic (below 6.0), you can add agricultural lime to raise the pH. If it is too alkaline (above 7.0), you can add sulfur or pine needles to lower the pH.
By regularly monitoring the temperature and pH levels of your compost pile, you can make adjustments as needed to create the optimal conditions for decomposition and ensure the production of high-quality compost for your garden.
VIII. Troubleshooting Common Composting Issues
A. Compost pile smells bad
If you’ve noticed a foul odor coming from your compost pile, don’t panic. This is a common issue that can be easily resolved with a few simple steps. The smell is usually caused by an imbalance in the composting process, which leads to the production of unpleasant gases.
To address this problem, start by checking the moisture levels in your compost pile. If it’s too wet, add some dry materials like leaves or straw to absorb the excess moisture. On the other hand, if your pile is too dry, sprinkle some water over it to increase the moisture content.
Another possible cause of the bad smell is the presence of anaerobic bacteria, which thrive in oxygen-deprived environments. To promote aerobic decomposition and eliminate the odor, turn your compost pile regularly to introduce fresh air. This will also help distribute the heat evenly and speed up the decomposition process.
Additionally, avoid adding meat, dairy products, or oily materials to your compost pile, as they can contribute to the foul smell. Stick to vegetable scraps, fruit peels, coffee grounds, and yard waste instead. If the smell persists, consider adding a layer of carbon-rich materials, such as shredded paper or cardboard, to help neutralize the odor.
B. Compost pile is not decomposing
If your compost pile seems to be taking forever to decompose, there may be a few factors at play. Firstly, check the carbon-to-nitrogen ratio of your compost. The ideal ratio is roughly 30 parts carbon to 1 part nitrogen. If your pile has too much carbon, it can slow down the decomposition process. In this case, add some nitrogen-rich materials like grass clippings or kitchen scraps to balance the ratio.
Another reason for slow decomposition could be insufficient moisture. Compost needs to be moist, but not overly wet, to break down effectively. If your pile is too dry, it can hinder the activity of decomposer organisms. Water the pile lightly to ensure it has adequate moisture, but be careful not to make it too soggy.
Temperature is another crucial factor in compost decomposition. The optimal temperature range for composting is between 110°F and 160°F (43°C to 71°C). If your pile is not reaching these temperatures, it may take longer to decompose. To increase the heat, turn the pile more frequently and consider insulating it with a layer of straw or a compost cover.
Lastly, make sure your compost pile has enough oxygen. Lack of oxygen can lead to anaerobic decomposition, which is slower and produces unpleasant odors. Turning the pile regularly will introduce oxygen and stimulate the activity of aerobic bacteria, resulting in faster decomposition.
C. Attracting pests to the compost pile
While composting is a natural process, it can sometimes attract unwanted pests. To prevent pests from invading your compost pile, follow these tips:
- Do not add meat, dairy products, or oily materials to your compost. These can attract pests like rats, raccoons, and flies.
- Avoid adding pet waste, as it can contain harmful bacteria and parasites.
- Keep your compost pile covered or enclosed to deter pests from accessing it. Use a compost bin or build a simple fence around the pile.
- Regularly turn your compost pile to disturb any potential pest habitats and discourage them from settling in.
- Avoid overfilling your compost bin, as this can create hiding spots for pests. Maintain a balanced ratio of greens and browns to ensure proper decomposition.
- If you notice signs of pests, such as chewed materials or droppings, take action immediately. Remove the affected materials and consider using natural pest deterrents like neem oil or diatomaceous earth.
By following these guidelines, you can maintain a healthy compost pile without attracting pests.
IX. Harvesting and Using Compost
Composting is a fantastic way to reduce waste and create nutrient-rich soil for your garden. Once your compost pile has gone through the decomposition process and turned into dark, crumbly compost, it’s time to harvest and use it in your garden. In this section, I will guide you through the signs that indicate your compost is ready for use, how to harvest it from the pile, and various ways to incorporate compost into your garden.
A. Signs that compost is ready for use
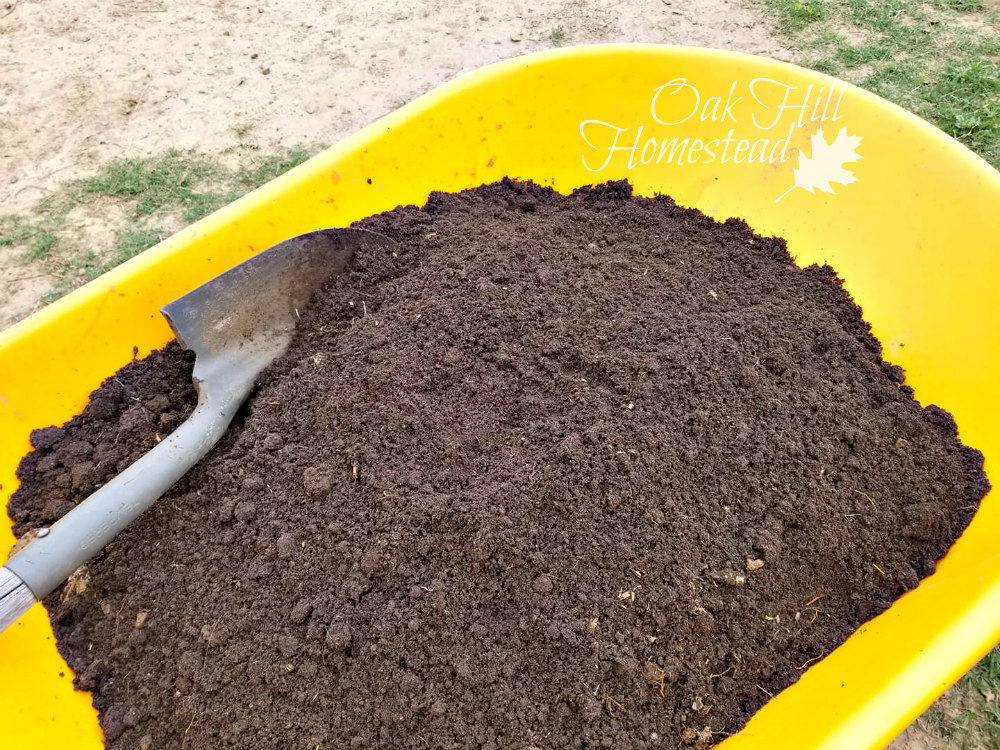
Knowing when your compost is ready for use is essential to ensure optimal results in your garden. Here are some signs that indicate your compost is fully decomposed and ready to be harvested:
- Dark color: Mature compost will have a dark brown or black color, indicating that it has broken down completely.
- Earthy smell: Compost that is ready for use will have a pleasant, earthy smell, similar to fresh soil.
- Cool temperature: When you touch the compost, it should feel cool to the touch. If it’s still warm, it means the decomposition process is ongoing.
- No recognizable materials: The compost should not contain any recognizable materials, such as food scraps or twigs. It should be a uniform, crumbly texture.
Once you observe these signs, you can be confident that your compost is fully matured and ready to be harvested.
B. Harvesting compost from the pile
Harvesting compost from your pile is a straightforward process. Follow these steps to ensure a successful harvest:
- Stop adding new materials: A few weeks before you plan to harvest the compost, stop adding new materials to the pile. This allows the remaining materials to finish decomposing.
- Prepare a collection area: Set up a designated area near your compost pile where you can collect the harvested compost. This can be a wheelbarrow, large container, or tarp.
- Use a compost fork or shovel: Carefully turn the compost pile using a compost fork or shovel. Start from the outside and work your way towards the center. This helps bring the fully decomposed compost to the surface.
- Collect the compost: As you turn the pile, collect the dark, crumbly compost and transfer it to your collection area. Separate any larger, uncomposted materials and return them to the pile for further decomposition.
- Store and cover: Once you have collected the compost, store it in a covered container or bin to protect it from rain and excessive moisture. This will help maintain its quality until you’re ready to use it.
By following these steps, you can efficiently harvest your compost and ensure that you’re only collecting the fully decomposed, nutrient-rich material.
C. Ways to use compost in the garden
Compost is a versatile soil amendment that offers numerous benefits to your garden. Here are some ways you can utilize compost to improve the health and productivity of your plants:
- Soil enrichment: Mix compost into your garden beds to improve soil structure, fertility, and moisture retention. Aim for a ratio of 1 part compost to 2 parts soil.
- Topdressing: Apply a thin layer of compost on the surface of your soil to provide a slow-release source of nutrients. This is especially beneficial for established plants.
- Seed starting: Create a nutrient-rich seed starting mix by combining compost with potting soil. This will give your seeds a healthy start and promote strong root development.
- Transplanting: When transplanting seedlings or new plants, add compost to the planting hole. This helps improve soil conditions and provides a nutrient boost to support their growth.
- Mulching: Use compost as a natural mulch around your plants. It suppresses weeds, retains moisture, and gradually releases nutrients into the soil.
- Compost tea: Make compost tea by steeping compost in water. Use this nutrient-rich liquid as a foliar spray or soil drench to provide a quick boost of nutrients to your plants.
These are just a few examples of how you can incorporate compost into your garden. Get creative and experiment with different applications to see what works best for your plants.
1. Envirocycle: The Most Beautiful Composter in The World
When it comes to composting, finding the right composter can make all the difference. One product that stands out from the rest is the Envirocycle Composter. With its unique design and innovative features, it has become a favorite among gardeners and environmental enthusiasts. In this section, we will analyze the details of this product and explore why it is the top choice for many.
Product Information
The Envirocycle Composter is a beautifully designed composter that not only serves its purpose but also adds aesthetic value to your garden. It is made from BPA-free, food-safe, and UV-protected materials, ensuring durability and longevity. The composter has a capacity of 35 gallons, providing ample space for your composting needs.
One of the standout features of the Envirocycle Composter is its dual-chamber design. This allows for continuous composting, as one chamber can be filled while the other is decomposing. The composter also comes with a base, which collects excess liquid compost, known as compost tea. This nutrient-rich liquid can be easily drained and used to fertilize your plants.
Why People Prefer Envirocycle Composter
There are several reasons why people prefer the Envirocycle Composter over other options. Firstly, its compact size makes it suitable for both small and large gardens. It doesn’t take up much space and can be easily placed on a patio or balcony.
Secondly, the Envirocycle Composter is incredibly easy to use. Its rotating drum design allows for effortless mixing and aeration of the compost. This ensures that the organic matter breaks down quickly and efficiently. The composter also has a door that provides easy access to the compost, making it convenient to remove the finished product.
Furthermore, the Envirocycle Composter is odorless and pest-resistant. The drum design prevents any unpleasant smells from escaping, keeping your garden smelling fresh. Additionally, the composter is critter-proof, ensuring that unwanted pests stay out of your compost.
Features
The Envirocycle Composter is packed with features that make composting a breeze. Apart from its dual-chamber design and rotating drum, it also has a compost tea collecting base. This base is detachable, making it easy to collect and use the nutrient-rich compost tea.
Another notable feature is the composter’s sturdy construction. It is built to withstand various weather conditions, ensuring that it remains functional and intact for years to come. The composter is also easy to assemble, with clear instructions provided.
Additional Features
In addition to its primary features, the Envirocycle Composter offers some additional benefits. It comes with a composting guide that provides useful tips and information on composting effectively. This is especially helpful for beginners who are new to the world of composting.
The composter also comes with a 5-year warranty, giving customers peace of mind knowing that their investment is protected. The customer service provided by Envirocycle is exceptional, with prompt responses and assistance for any queries or concerns.
Pros
| Pros | Cons |
|---|---|
| 1. Dual-chamber design for continuous composting | 1. Limited capacity of 35 gallons |
| 2. Rotating drum for easy mixing and aeration | 2. May be too small for large-scale composting |
| 3. Odorless and pest-resistant | 3. Relatively higher price compared to other composters |
| 4. Detachable base for collecting compost tea | 4. Requires regular turning for optimal results |
| 5. Sturdy construction for durability | 5. Assembly may take some time and effort |
2. FCMP Outdoor IM4000 Tumbling Composter
When it comes to composting, the FCMP Outdoor IM4000 Tumbling Composter is a top choice for many gardeners. This innovative composter offers a range of features that make composting easier and more efficient than ever before.
Product Information
The FCMP Outdoor IM4000 Tumbling Composter is designed to simplify the composting process. It features two chambers, allowing you to compost in one chamber while the other chamber is curing. This dual-chamber design ensures a continuous supply of compost for your garden.
The composter is made from durable, UV-resistant polypropylene material, ensuring that it can withstand the elements and last for years. It has a capacity of 37 gallons, providing ample space for your organic waste.
Why People Prefer This Product
There are several reasons why gardeners prefer the FCMP Outdoor IM4000 Tumbling Composter. Firstly, its tumbling design makes it easy to turn and mix the compost, ensuring proper aeration and faster decomposition. This results in high-quality compost in a shorter amount of time.
Additionally, the dual-chamber design allows for continuous composting. While one chamber is full and curing, you can continue adding new waste to the other chamber. This eliminates the need to wait for one batch of compost to finish before starting another.
Furthermore, the durable construction of the composter ensures that it can withstand the outdoor elements without deteriorating. Its UV-resistant material prevents fading and cracking, making it a long-lasting investment for your garden.
Features
The FCMP Outdoor IM4000 Tumbling Composter is packed with features that enhance the composting process. Some notable features include:
- Two chambers for continuous composting
- Tumbling design for easy mixing
- 37-gallon capacity
- Durable, UV-resistant polypropylene construction
- Adjustable air vents for proper aeration
- Removable door for easy access to compost
Additional Features
In addition to its primary features, the FCMP Outdoor IM4000 Tumbling Composter offers some additional benefits that make it stand out from other composters on the market. These include:
- Easy assembly with no tools required
- Compact size that fits well in any garden
- Rodent-proof design to prevent unwanted visitors
- Comes with a composting guide to help beginners
Warranty & Service
The FCMP Outdoor IM4000 Tumbling Composter comes with a limited warranty to provide peace of mind to customers. The warranty covers any defects in materials or workmanship for a specified period of time. Additionally, the company offers responsive customer service to address any concerns or issues that may arise.
Pros
| Pros | Cons |
|---|---|
| Continuous composting with dual chambers | Requires some physical effort to tumble |
| Tumbling design for easy mixing | May be too large for small gardens |
| Durable construction for long-lasting use | Assembly can be time-consuming |
| Adjustable air vents for proper aeration | May attract pests if not properly maintained |
3. Yimby Tumbler Composter
When it comes to composting, the Yimby Tumbler Composter is a top choice for many gardeners. This innovative composting solution offers a range of features that make it easy to create nutrient-rich compost for your garden. In this section, we will analyze the details of the Yimby Tumbler Composter, including its benefits, features, additional features, warranty and service, as well as its pros and cons.
Product Information
The Yimby Tumbler Composter is designed with convenience in mind. It has a capacity of 37 gallons, providing ample space for your organic waste. The tumbler design allows for easy mixing and aeration, ensuring that your compost breaks down quickly and efficiently. Made from durable materials, this composter is built to withstand the elements and last for years.
Why People Prefer the Yimby Tumbler Composter
There are several reasons why gardeners prefer the Yimby Tumbler Composter over other options. Firstly, its tumbler design makes it easy to turn and mix the compost, promoting faster decomposition. This means that you can enjoy nutrient-rich compost in a shorter amount of time. Additionally, the Yimby Tumbler Composter is compact and space-saving, making it ideal for small gardens or urban environments.
Furthermore, this composter is odor-free, thanks to its airtight design. You can compost your kitchen scraps without worrying about unpleasant smells. The Yimby Tumbler Composter also helps to keep pests and rodents away, ensuring a clean and hassle-free composting experience.
Features
The Yimby Tumbler Composter is packed with features that make composting a breeze. It has a dual-chamber design, allowing you to have one chamber for active composting while the other chamber is maturing. This means that you can continuously add organic waste to one chamber while the other chamber produces finished compost.
Another notable feature is the adjustable air vents. These vents allow you to control the airflow and moisture levels inside the composter, ensuring optimal conditions for decomposition. The Yimby Tumbler Composter also comes with a built-in mixing bar, which helps to break up clumps and ensure even distribution of materials.
Additional Features
In addition to its main features, the Yimby Tumbler Composter offers some additional benefits. It comes with a composting guide that provides helpful tips and instructions for successful composting. The composter is also easy to assemble, with clear instructions and minimal tools required. Moreover, it has a sturdy base that provides stability and prevents tipping.
Warranty & Service
The Yimby Tumbler Composter comes with a 1-year warranty, giving you peace of mind in case of any manufacturing defects. The company also offers excellent customer service, ready to assist you with any questions or concerns you may have. They are committed to ensuring customer satisfaction and providing a positive composting experience.
Pros and Cons
| Pros | Cons |
|---|---|
| 1. Easy to turn and mix compost | 1. Limited capacity for larger gardens |
| 2. Compact and space-saving design | 2. Requires regular turning for optimal results |
| 3. Odor-free and pest-resistant | 3. May be challenging to assemble for some users |
| 4. Dual-chamber design for continuous composting | 4. Not suitable for composting meat or dairy products |
| 5. Adjustable air vents for optimal conditions | 5. May require occasional maintenance and cleaning |
4. Exaco Trading Co. ECO-2000 Plus Kitchen Compost Waste Collector
The Exaco Trading Co. ECO-2000 Plus Kitchen Compost Waste Collector is a top-of-the-line composting solution for your kitchen. With its innovative design and user-friendly features, it has quickly become a favorite among gardening enthusiasts and eco-conscious individuals.
Product Information
The ECO-2000 Plus Kitchen Compost Waste Collector is made from high-quality, durable plastic that is built to last. It has a capacity of 2.4 gallons, providing ample space for your kitchen scraps. The collector features a tight-sealing lid, which helps to prevent odors and keep pests out. The lid also has a built-in carbon filter, ensuring that any unpleasant smells are neutralized.
This compost waste collector is designed to fit neatly on your kitchen countertop or under the sink, making it easily accessible while also saving space. It has a handle on the lid for convenient carrying and emptying. The collector is dishwasher safe, making it easy to clean and maintain.
Why People Prefer This Product
There are several reasons why people prefer the Exaco Trading Co. ECO-2000 Plus Kitchen Compost Waste Collector. Firstly, its compact size and sleek design make it a perfect fit for any kitchen. It doesn’t take up much space and can be easily integrated into your existing kitchen setup.
Secondly, the tight-sealing lid and carbon filter ensure that no odors escape, keeping your kitchen smelling fresh and clean. This is especially important if you live in an apartment or have limited outdoor space for composting.
Thirdly, the durable construction of the collector ensures that it will last for years to come. It is made from high-quality materials that are resistant to cracking and fading, even with regular use.
Features
The Exaco Trading Co. ECO-2000 Plus Kitchen Compost Waste Collector is packed with features that make composting a breeze. The tight-sealing lid not only prevents odors but also keeps out fruit flies and other pests. The carbon filter inside the lid helps to neutralize any smells that may escape, ensuring a pleasant kitchen environment.
The collector has a large handle on the lid, making it easy to carry and empty. The handle is sturdy and comfortable to grip, even when the collector is full. The 2.4-gallon capacity is generous enough to hold a significant amount of kitchen scraps, reducing the frequency of emptying.
Additionally, the collector is dishwasher safe, allowing for easy cleaning and maintenance. Simply remove the lid and place both parts in the dishwasher for a thorough clean. This feature saves you time and effort, making composting a hassle-free process.
Additional Features
In addition to its primary function as a compost waste collector, the Exaco Trading Co. ECO-2000 Plus Kitchen Compost Waste Collector has some additional features that enhance its usability. The collector comes with a set of compostable bags, which fit perfectly inside and make emptying even more convenient. These bags are made from plant-based materials and can be added to your compost pile along with the kitchen scraps.
The collector also includes a handy instruction manual that provides detailed guidance on composting and using the product effectively. It offers tips and tricks for maximizing the composting process and achieving optimal results.
Warranty & Service
The Exaco Trading Co. ECO-2000 Plus Kitchen Compost Waste Collector comes with a 1-year warranty, ensuring that you are covered in case of any manufacturing defects or issues. The company has a dedicated customer service team that is ready to assist you with any questions or concerns you may have. They are committed to providing excellent service and ensuring customer satisfaction.
Pros and Cons
| Pros | Cons |
|---|---|
| Compact and space-saving design | May be too small for larger households |
| Tight-sealing lid and carbon filter prevent odors | Replacement carbon filters may be required |
| Durable construction for long-lasting use | May be more expensive than other options |
| Easy to carry and empty | Requires regular emptying for optimal use |
| Dishwasher safe for easy cleaning | Not suitable for outdoor composting |
5. Miracle-Gro Dual Chamber Compost Tumbler
The Miracle-Gro Dual Chamber Compost Tumbler is a revolutionary product that makes composting easy and efficient. It is designed to help you create nutrient-rich compost for your garden, while minimizing the effort and time required.
Product Information
The Miracle-Gro Dual Chamber Compost Tumbler features two separate chambers, allowing you to have a continuous composting process. While one chamber is actively composting, the other chamber can be used to add fresh organic waste. This dual chamber design ensures that you always have a steady supply of compost for your garden.
The tumbler is made from durable and weather-resistant materials, ensuring its longevity even in harsh outdoor conditions. It has a large capacity of 2 x 18.5 gallons, providing ample space for composting. The t